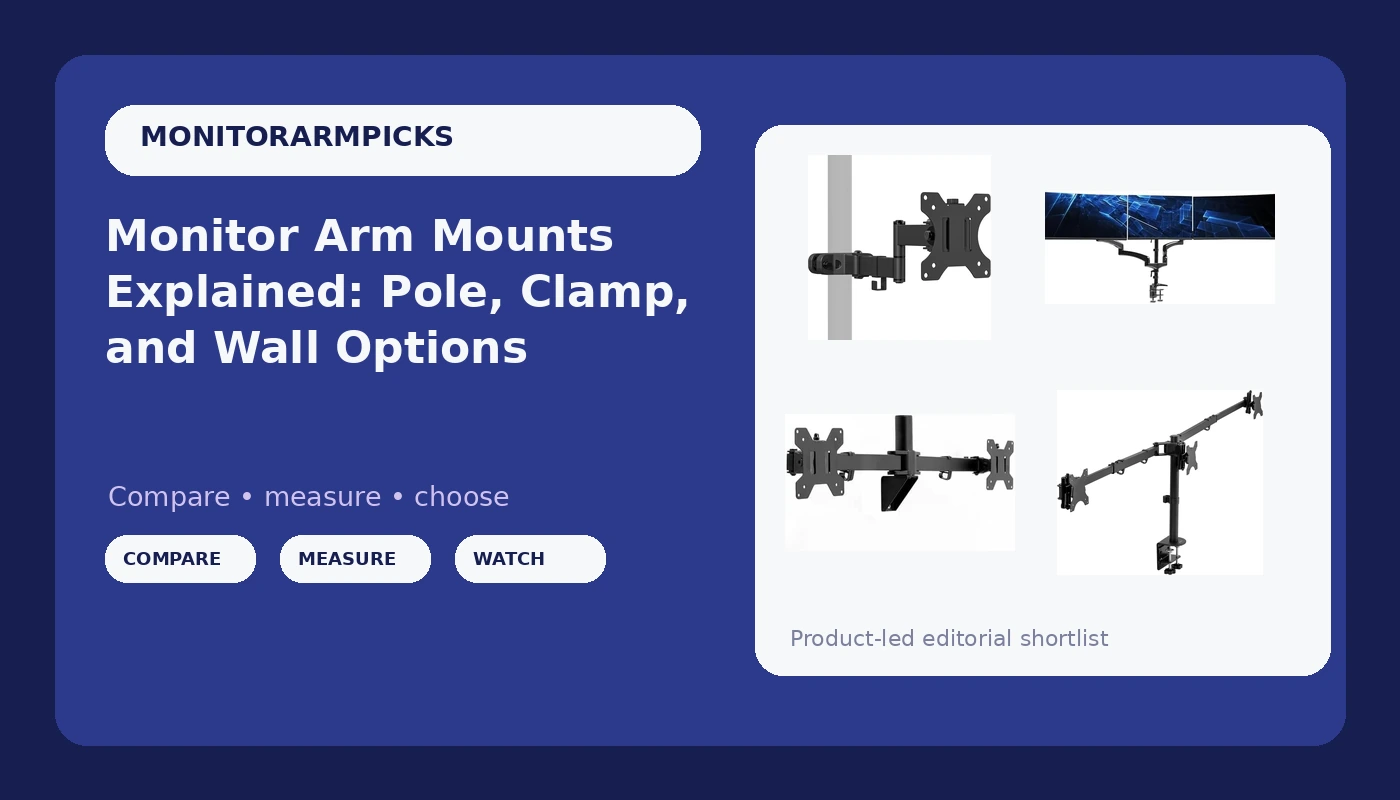
Most monitor arm mounts fail for boring reasons. Not a snapped gas spring, not a bad paint job: the desk edge was too thick for the clamp, the monitor had no VESA holes, or the wall behind the desk was the only surface with enough room and nobody checked what was behind the drywall. Sorting through monitor arm mounts starts with two facts you can verify in five minutes, the VESA pattern on the back of the screen and the surface the mount will actually grip, and only then moves on to the interesting part: how many screens, and how they should float. The four options below cover a single pole mount, a triple pneumatic desk stand, a dual wall mount, and a triple desk mount built around an ultrawide center screen.
Related: Monitor Arm vs Desk Stand: Which One Fits Your Setup →
Quick answer
A monitor mount works only when three things line up: your screen has a 75x75mm or 100x100mm VESA pattern, the mounting surface (desk edge, grommet hole, wall, or pole) can take the hardware, and the arm's weight rating clears your monitor with real headroom. For one screen on a desk that can accept a clamp or a pole base, a single mount with a removable VESA plate is the simplest path. Two screens with no usable desk edge usually point to a wall mount with telescoping arms. Three screens point to a pneumatic desk stand, and if the center panel is a 38 inch ultrawide, you need a mount whose center bracket is rated for it.
Four useful options
| Model | Best fit | What stands out |
|---|---|---|
| WALI Single Monitor Arm Mount, 011ARM | One screen, 17 to 32 inches, simple hardware | Removable VESA plate covering both 75mm and 100mm patterns |
| VIVO Triple Pneumatic Monitor Mount, STAND-V300G | Three screens up to 32 inches on a desk | Pneumatic arms on a heavy duty C-clamp base |
| VIVO Premium Dual Wall Mount, MOUNT-TS32B | Two screens, 21 to 32 inches, no desk edge to clamp | Heavy duty telescoping arms in a flush wall setup |
| VIVO Premium Triple Desk Mount, STAND-TS03C | Three screens with an ultrawide in the center | Center bracket rated for panels up to 38 inches and 22 lbs per screen |
Single screen with the simplest hardware: WALI Single Monitor Arm Mount
The removable VESA plate is the detail worth understanding here. On a fixed mount, you bolt the plate to the arm, then try to hold a monitor in the air while threading screws into a pattern you cannot see. A removable plate lets you attach the plate to the monitor first, on a table, then hang the monitor on the bracket. That single design choice removes most of the frustration from a one-person install.
What you give up is scale. This is a single-screen bracket. There is no second arm, no crossbar, no way to grow it into a side-by-side layout later. It is also a pole design, which means the base and pole carry the load rather than a gas spring or a clamp on a desk edge. That makes it useful in places a C-clamp cannot go, including the outdoor and RV applications named in the listing, but it also means the monitor's range of motion is defined by the pole and joint assembly rather than a pressurized cylinder.
Three screens on pneumatic arms: VIVO Triple Pneumatic Monitor Mount
Pneumatic is the word that matters in this listing. A pneumatic arm holds its position with a pressurized cylinder, so repositioning a screen is a matter of moving it rather than loosening a bolt, nudging the panel, and tightening the bolt again. That difference shows up over months, not minutes. If your workflow involves swinging a screen toward you for a document or pushing it back for a wider view, the adjustment mechanism is the feature you will interact with daily.
The trade-off is concentration of load. Three screens, three arms, and one C-clamp means the entire assembly is anchored at a single point on the desk edge. That makes the clamp and the desk lip the critical parts of the install, not the arms. A thin or hollow-core desk edge is the wrong host for this kind of mount regardless of how good the arms are, and the desk thickness and lip depth need to be measured before ordering anything.
Two screens off the desk entirely: VIVO Premium Dual Wall Mount
Wall mounting solves a problem that no clamp design can solve: a desk that should not be clamped. Glass tops, thin veneer edges, standing desks with a frame right where the clamp needs to sit, and desks pushed flush against a wall all fall into that category. Moving the load into the wall takes the desk out of the equation, and telescoping arms still allow some in-and-out movement, so the setup does not have to be static.
The trade-off is that you have traded a furniture question for a structural one. A wall mount transfers the weight of two screens plus the arm's leverage into the wall, so the fastening method matters more than the mount's finish. Studs, appropriate anchors, and a mounting height that puts the top of the screens near eye level should be settled before drilling. Renting also changes the math, since wall mounting is a harder thing to undo than removing a clamp.
Three screens with an ultrawide in the middle: VIVO Premium Triple Desk Mount
An ultrawide flanked by two standard panels is the hardest geometry in desk mounting, because the center screen is both heavier and wider than the arms were originally designed to carry. The center bracket rating here is the number to read first: up to 38 inches, and 22 lbs per screen. That weight figure is where the headroom question lives. A 22 lb rating against a 15 lb panel leaves room for the VESA plate, an adapter, and the cables running through the channels, which is exactly the margin that keeps an arm from creeping downward over time.
Telescoping arms matter for a different reason on a wide layout. With a 38 inch center panel, the side screens often need to sit slightly behind or in front of the center plane to match viewing angles. Arms that extend and retract let you tune that relationship instead of accepting whatever depth the fixed bracket dictates. The caveat is that the wider the layout, the more the whole assembly depends on a solid desk edge, since the leverage on the clamp grows with every inch of reach.
Prices and availability may change. Product images, names, and retailer links are matched to verified listings. No current price, rating, stock status, or measured result is stated here without current evidence.
How VESA patterns and weight ratings narrow the list
VESA is the mounting standard behind almost every monitor sold today. For screens in the 17 to 32 inch range, the two patterns you will encounter are 75x75mm and 100x100mm, and many larger ultrawides still use 100x100mm even at 34 or 38 inches. A mount that supports both patterns, like the removable plate on the WALI bracket, covers more monitors with one piece of hardware. Adapters exist for unusual patterns, but they add depth between the arm and the panel, which adds leverage and eats into your weight margin.
Weight ratings deserve more respect than they usually get. A rating is not the weight at which the arm functions; it is closer to the weight at which it stops functioning correctly. A 22 lb rating holding a 15 lb monitor is the setup you want, because the tilt joint and the arm's mechanism are working well inside their limit. Push a mount to its stated maximum and the first symptom is usually a tilt joint that slowly droops, followed by an arm that will not stay at full extension.
There is one more rating trap: the number assumes the monitor is the only thing on the arm. Add a VESA adapter, a heavier aftermarket plate, or a bundle of stiff display cables pulling against the joint, and you are above the figure on the spec sheet. Cables routed through a channel instead of hanging free are not just a cosmetic improvement, they remove a small but constant force from the arm.
Clamp, grommet, wall, or pole: choose the mounting surface first
The mounting surface is a measurement problem, not a style preference. A C-clamp needs a flat, solid lip and enough clearance underneath for the clamp body, typically an inch or two depending on the design. A grommet mount uses the cable hole already drilled in the desk, which is convenient but requires a hole in the right place. A wall mount needs framing or anchors capable of handling the arm's leverage. A pole mount needs a stable base or a structure to attach to, which is why pole designs show up in RV and outdoor listings where a desk edge may not exist at all.
Here is the sequence worth following before you compare features:
- Measure your desk thickness and the depth of the front lip, then check whether anything structural blocks the underside where a clamp would sit.
- Check the VESA pattern on the back of every monitor you plan to mount, and note whether the pattern is recessed or surrounded by a curved housing.
- Weigh each monitor from its spec sheet, then add a pound or two for the plate, an adapter, and cables.
- Decide how many screens you are mounting now, and whether the center one is an ultrawide, since that single fact eliminates many triple mounts.
- Match the mount type to the surface you confirmed in step one, and only then compare arm mechanisms, cable channels, and adjustment style.
Practical guidance before you order
- Confirm the clamp or base fits your desk before anything else. A mount that cannot attach is not a deal at any price.
- Keep the original monitor stand. If you move, sell the monitor, or need to test a different layout, the factory stand is the fallback.
- Torque the bolts, then re-check them after a week. Joints settle under load, and a loose bolt is the beginning of a sagging screen.
- Favor tool-free tilt adjustment. If changing the tilt angle requires hunting for a hex key, you will set it once and live with the result.
- Leave an inch or two of clearance behind the screens for cable routing, and plan the path down the arm before you mount the panel, not after.
- Route cables through the channels even when they are visible from the front. Dangling cables pull on the joints and make a floating monitor look unfinished.
Which option should you choose?
Choose the WALI Single Monitor Arm Mount when you have one screen between 17 and 32 inches and want the least complicated hardware, especially if the mounting point is a pole or a surface other than a standard desk edge. Choose the VIVO Triple Pneumatic Monitor Mount when you are running three screens up to 32 inches and your desk edge can take a C-clamp with a solid lip. Choose the VIVO Premium Dual Wall Mount when you have two screens between 21 and 32 inches and no desk edge suitable for clamping, or when you want the desk surface completely clear. Choose the VIVO Premium Triple Desk Mount when your layout centers on an ultrawide up to 38 inches with two side panels, and you need the center bracket and per-screen weight rating to match.
None of these choices fix a desk that cannot support the mounting method, and none of them change the fact that a monitor with no VESA pattern needs an adapter before any arm will attach. The listings give you ranges and ratings to check against your own hardware, not a substitute for measuring the desk, weighing the panels, and confirming the mounting surface. Where a specific number is not stated in the product record, treat it as unknown rather than assumed.
The bottom line
Monitor mounting is a three-part decision: VESA pattern, mounting surface, then screen count. Get those in order and the shortlist builds itself. One screen with simple hardware points to a single pole mount with a removable VESA plate. Three screens up to 32 inches on a clampable desk points to a pneumatic triple stand. Two screens on a desk that should not be clamped points to a wall mount with telescoping arms. Three screens with an ultrawide in the middle points to a heavy-duty triple desk mount with a center bracket rated for the panel you actually own. Check the current Amazon price on each and compare against your measurements, not the other way around.