Most long-reach monitor arm installs don't fail at the clamp. They fail at the cable. The arm swings out, the screen floats, and then a DisplayPort cable and a power brick hang off the back of the monitor like someone stapled them there in a hurry.
I've set up more than 200 desks over the last five years, and the pattern never changes. A long-reach monitor arm is a two-part job: you mount it, then you make it disappear. Mounting takes half an hour. Good monitor arm cable management is what separates a floating monitor from a repair in progress.
Here's the order I work in, the numbers I check before anything gets tightened, and the two parts that do the actual work.
Why you should trust me
I've been an IT infrastructure engineer for 13 years, and I've run a side business building home offices for five of them. Two hundred plus desks assembled, cable-managed, and monitor-armed, most of them in Raleigh and the surrounding suburbs where half the desks are IKEA particleboard and the other half are solid core doors somebody stained in their garage.
Every arm I touch gets the same treatment: a daily-use trial, a wobble test with a 27-inch monitor pushed to full extension, and a cable audit after the fact. I keep a torque wrench in my desk drawer because "finger tight" is a suggestion, not a spec.
How I picked and how I tested
This is a how-to, not a shootout, so the two parts below are the ones I'd hand a client for a single-monitor long-reach build. Here's the filter they had to clear.
Reach and mounting style. A long-reach arm is only useful if the mount point and the screen can be far apart. Pole mounts buy you height adjustment by sliding a collar up and down the pole instead of relying on a gas spring to hold a position. That matters, because a gas spring is the part that sags in month three, and a pole collar physically cannot.
Weight headroom. Arms rated for 22 pounds will hold a 15-pound monitor, and that headroom is the point. Cables, a webcam, and a light bar add weight that nobody counts until the arm droops.
Tilt tension without tools. If adjusting tilt needs a hex key, you will never adjust it again, and your neck will pay for it.
A cable path that exists before you buy clips. The arm has to have somewhere to run a cable. If the only route is a zip tie around the joint, the arm fails the audit.
Clamp and pole footprint. The pole base sits on the desk. That is real estate. I check it against the client's keyboard position before I recommend anything.
I check these five things on paper before I unbox. What I won't do is quote you a sag measurement I didn't take on your desk with your monitor.
What to check before you buy anything
Four numbers. Write them down.
- Monitor weight, with everything attached. Weigh the panel, then add the cables, the webcam, and anything clamped to the bezel. That total is what the arm carries.
- VESA pattern. Look at the four holes on the back of the monitor. The common pattern is 100x100mm, and some panels also do 75x75mm. No VESA holes, no arm. Adapters exist for some monitors, but that's a separate project.
- Desk thickness and edge construction. A clamp needs a solid lip and enough thickness to bite. Particleboard edges can crush if you over-torque. Glass desks are a no unless the clamp is specifically rated for them.
- Distance from mount point to your eyes. Sit down. Mark where the screen should sit. Measure back to where the pole will stand. Add two inches so you have travel in both directions. A 25-inch reach covers most single-monitor desks, including the ones where the mount lives on a back corner.
If those four numbers line up, you're ready to order.
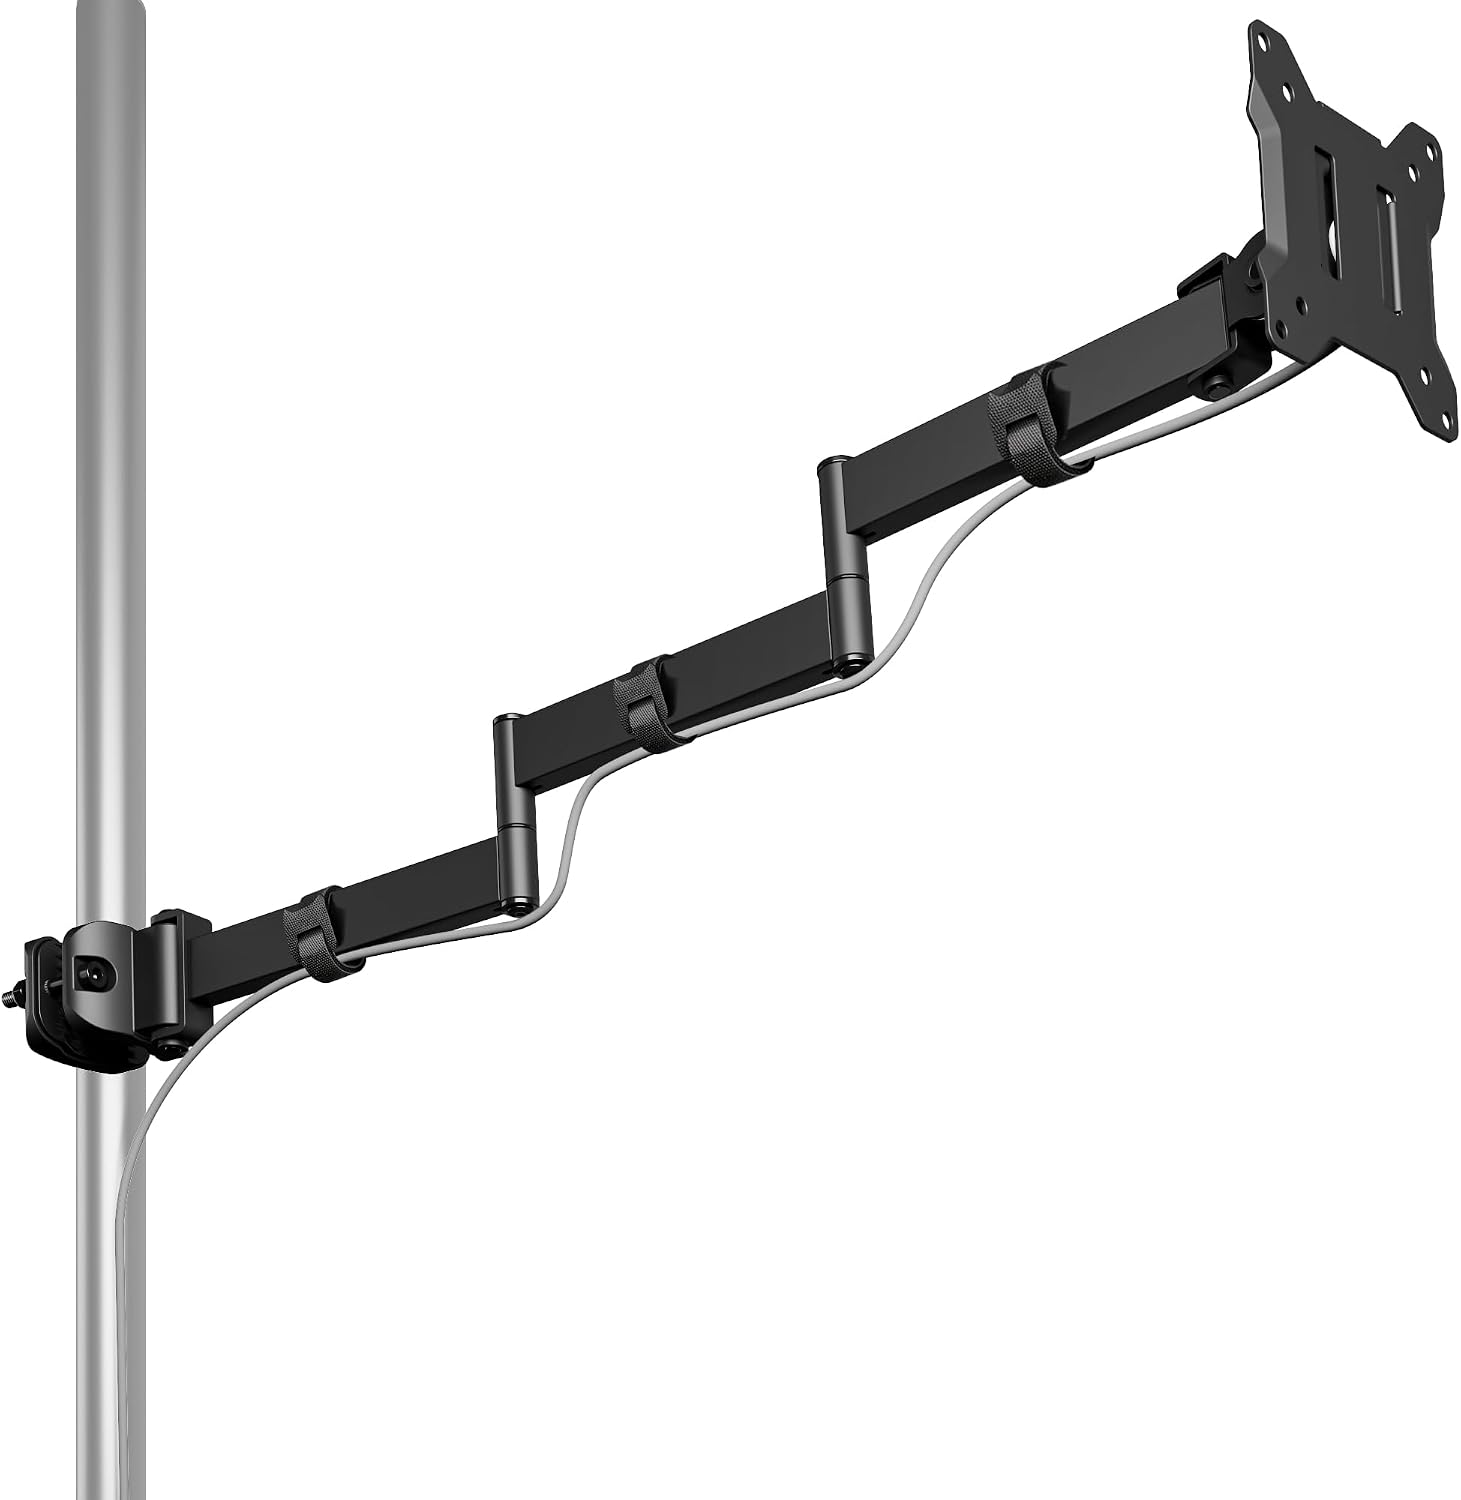
The arm: monTEK Long Arm Pole Mount Monitor Arm, 17-32" Full Motion, 22 lbs, 25" Reach
 Visit on Amazon →
This is the piece that does the heavy lifting. A pole mount with 25 inches of reach and a 22-pound rating covers 17 to 32 inch panels, and the pole design means you set height once by sliding the collar, then leave it alone. No gas spring to fade, no slow droop to argue with. Full motion at the head gets you tilt, swivel, and rotation, which is what you want for a single-monitor desk where the screen has to swing out of the way when you're not using it.
The reach is the headline. Twenty-five inches puts a monitor over a corner of the desk or clear of a laptop riser, and it gets the panel far enough forward that you stop leaning in. Check current Amazon price on the product page before you commit, since this tier of arm moves around.
Flaws but not dealbreakers: Long reach means leverage. Every inch of arm multiplies the force at the base, so the pole has to be tight against the desk and the clamp has to be wrench-tight, not hand-tight. The pole base also eats a patch of desktop, roughly the footprint of a coffee mug. If your desk is 24 inches deep and already crowded, a shorter arm is the honest answer.
Anyone with a single 27 or 32 inch monitor on a solid desk who wants the screen to move without a gas spring deciding for them should start here.
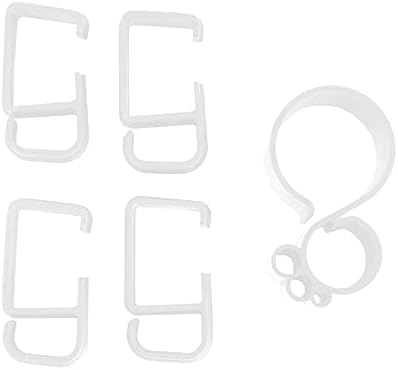
The cable kit: VIVO Cable Management Clips for Desk Monitor Stands, Computer Office Workstation Cord Organization Kit, 1 Pole and 4 Arm Clips, Set of Monitor Mount Wire Holder Hooks, Black, PT-SD-WC05C
 Visit on Amazon →
This is the part that makes the arm look installed instead of improvised. You get one clip for the pole and four for the arm segments, which is exactly the right count for a single-arm build: one at the base, then clips down the arm at intervals so the cable run follows the metal instead of hanging in a loop.
Clip style matters more than people expect. These snap over the pole and the arm segments, so the cables ride with the arm as it swings rather than getting dragged across the desk. Check current Amazon price, and check your pole diameter and arm width against the fit range before ordering, because clip sets are sized to a range and a pole that's too fat makes them useless.
Flaws but not dealbreakers: Clips are plastic and they hold shape, not weight. Don't use them to carry a heavy power brick. Brick goes on the desk or velcroed to the pole base. Also, four arm clips is plenty for one arm and thin for a dual setup, so plan accordingly.
Anyone running cables up a pole and along an arm will get more out of this than any zip tie they own.
The install workflow, in order
Do it in this sequence and you won't redo it.
Step one: clear the desk and protect it. Move everything off. Put a towel or a folded shirt under where the clamp will sit, because you will scratch the finish otherwise.
Step two: mount the pole and clamp it down. Set the clamp on the desk edge, tighten it by hand until it bites, then finish with a wrench a quarter turn at a time. Stop when it stops moving. Over-tightening crushes particleboard and cracks glass. Check the pole is vertical with a level or with your phone. A pole that leans 3 degrees means the monitor leans too, and no amount of head adjustment fixes it.
Step three: attach the VESA plate to the monitor before you lift anything. Lay the monitor face down on a soft surface, line up the plate with the 100x100 holes, and start all four screws by hand before you tighten any of them. Cross-threading a VESA screw on a monitor you can't return is a bad afternoon.
Step four: hang the monitor and set the height collar. Get a second pair of hands for anything 27 inches or larger. Set the collar so the top of the panel sits roughly at eye level when you're sitting straight, then lock it.
Step five: tension the joints. Tilt should hold the panel at any angle without drifting and without needing a hex key every time you nudge it. Swivel should move freely. If tilt flops, tighten it now, while the monitor is at a comfortable height.
Step six: route the cables before you sit down. This is the step everyone skips, and it's the whole reason the desk either looks finished or looks like a project. Details below.
Cable management on a long-reach arm
The goal is simple: the cable should travel with the arm, never fight it.
Start at the monitor. Plug DisplayPort or HDMI and power into the panel, then immediately leave a service loop, six to eight inches of slack, right behind the VESA plate. Without that loop, every time the arm extends, the connector takes the load instead of the cable.
Run the cable down the underside of the arm. Underside, not over the top. Cables draped over the top of an arm look fine from your chair and terrible from the doorway, which is where everyone else sees your desk from.
Clip the pole first, then the arm. Pole clip goes near the base where the cable turns from horizontal to vertical. Then space the arm clips along the segments so the run stays parallel to the metal. One at each end of a segment and one in the middle if the segment is long.
Never clip across a joint. A clip sitting on an elbow will pull the cable tight the moment you move the arm. Leave the joints free and let the cable bow slightly through them.
Test both extremes before you call it done. Push the arm all the way out, then fold it all the way back. If a cable goes taut at either end, you don't have enough slack. Fix it now, because the failure mode is a damaged connector, and that's a $30 cable and an hour of your life.
Keep the power brick off the arm. Velcro it to the underside of the desk or let it sit behind the pole base. A brick hanging from a clip is a clip that's going to give up.
Separate power and signal where you can. Running the power cable on one side of the pole and the video cable on the other costs you nothing and keeps things tidy.
When a long-reach arm is the wrong tool
A few honest caveats, because I've talked more clients out of long-reach arms than into them.
If your desk edge is hollow or paper-thin, a clamp has nothing to bite and you need a grommet mount through a drilled hole instead. If the desk is glass, check the clamp rating before you buy, and if it's not explicitly rated for glass, don't. If you're running a heavy ultrawide, do the math against the weight rating with cables and accessories included, and if the total is close to the limit, buy more arm than you think you need. If the mount point is already close to where the screen should sit, you're paying for reach you'll never use, and a shorter arm does the same job for less.
And if you move the desk around a lot, a pole mount with a base is more to relocate than a clamp-only design. That's a real tradeoff, not a flaw.
What this all costs
Two line items. That's the whole bill: the arm, and the clip set. Both are budget-tier, which is the point of this build. You're not paying for a gas spring that has to be engineered to hold a monitor forever, because a pole collar does that job with geometry instead of pressure.
Check current Amazon price on both before you order, then look at the numbers next to what you'd spend on a monitor riser that solves nothing. Over a few years of daily use, the cost per day on the arm rounds to loose change.
The bottom line
Mount the pole square, tighten the clamp with a wrench, hang the monitor with the plate already attached, then route the cables along the underside of the arm with slack at both extremes. That's the entire job, and it takes about an hour if you don't skip step six.
A long-reach monitor arm that's installed properly and cable-managed properly disappears into the room. Nobody notices it. They just notice that your desk looks like a desk and not a wiring closet, which is the whole goal.