Most dual monitor arms do not fail because the arm is bad. They fail because the clamp was never going to fit the desk, nobody checked the VESA pattern, and the cables got left for last. Dual monitor arm cable management is not a finishing touch you get to at the end of an install. It is a step in the middle, and skipping it is why so many floating monitors end up looking broken from the front of the desk.
I have set up more than 200 desks over the last five years, most of them in home offices where the desk was bought online, the two monitors came from different brands, and nobody measured anything before ordering. The installs that still look good a year later are boring ones. Measure the desk. Verify the mount. Hang the screens. Route the cables while the arms are still loose. Tighten everything in one pass at the end.
That is the whole method, and this guide walks it in order. Two pieces of gear carry most of the weight here, and neither one is a premium arm.
Why you should trust me
I am an IT infrastructure engineer by day, 13 years in, and I run a side business setting up home offices on nights and weekends. That is 200-plus desks assembled, cable-managed, and monitor-armed, from cheap particleboard writing desks to solid walnut slabs in a client's spare bedroom.
I keep a torque wrench in my desk drawer because "finger tight" is not a specification. I test arms the way my clients use them: a 27-inch panel fully extended on the arm, tilt and swivel worked daily, and a cable audit from the front of the desk. An arm that looks fine in photos but sags in month three was never cheap. It was just deferred.
How I picked and how I tested
Every arm that earns a recommendation here goes through the same checklist before I will put it on a client's desk. It gets a real daily-use window, a wobble check with a 27-inch monitor at full extension, and a cable audit. I do not publish a pick on day one.
Four things decide the outcome:
Gas spring headroom. An arm rated for 15.4 pounds will hold a 13-pound monitor, and that gap is the point. Weight ratings assume the monitor is the only load on the joint. Add a VESA adapter plate, a heavy aftermarket stand-off, or a monitor with a thicker chassis and you eat into the margin. Buy headroom, not a perfect match.
Tool-free tilt and swivel. If adjusting tilt requires a hex key, you will adjust it once and then live with a crooked screen for two years. I have watched it happen in three different client offices.
Clamp fit. Desk clamp versus grommet mount is not a style choice, it is a desk-thickness problem. A clamp needs enough flat edge and enough clearance underneath. Measure first, order second.
Cable channels and sleeves. A floating monitor with dangling cables looks like a mistake. The arm has to hide the run, and the sleeves have to bundle it.
What you need before you start
Two pieces of gear cover the whole job: the arm that holds the screens and the kit that keeps the wires from ruining the look. Everything else you already own.
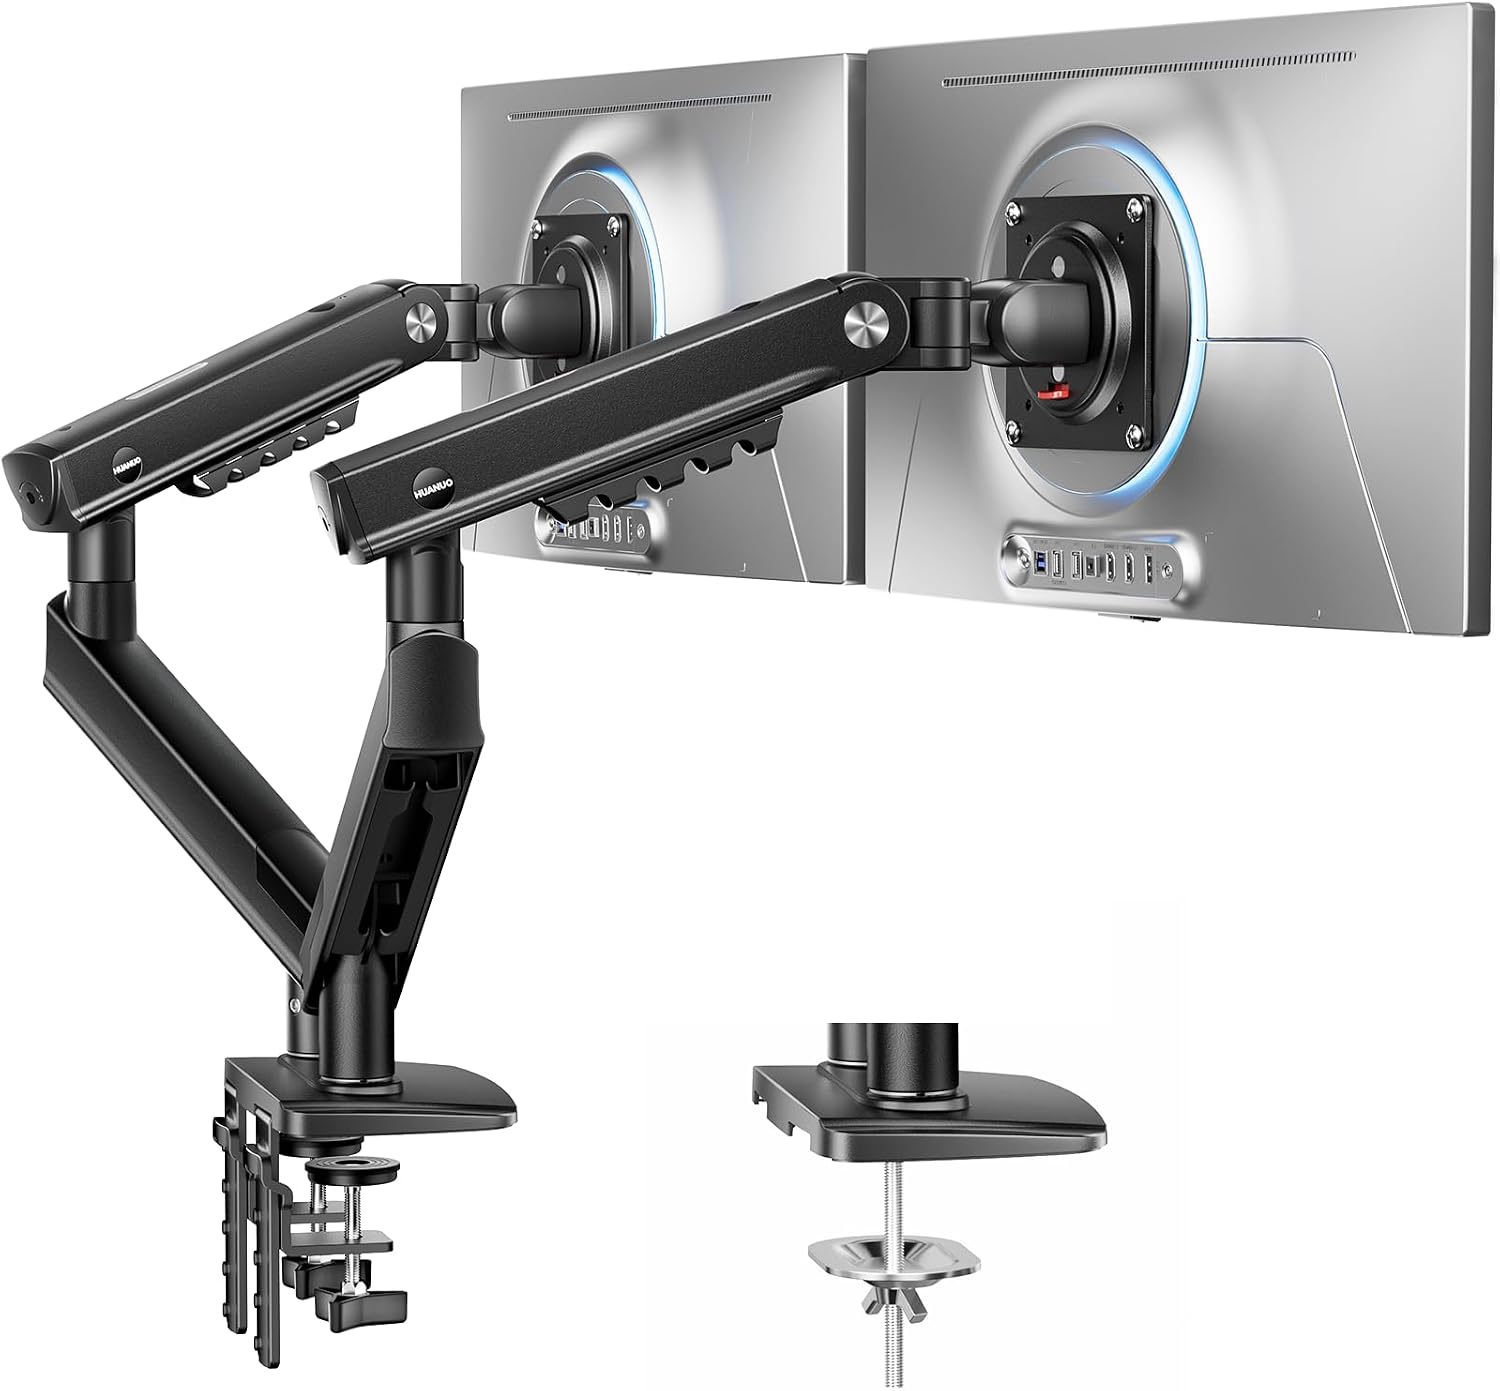
Our pick: HUANUO FlowLift Pro Dual Monitor Mount for 13-27" Screens, MechaSpring Monitor Stand, Adjustable Monitor Arms for 2 Monitors with Tilt/Swivel/Rotation, Tool-Free VESA Mount, Max Load 15.4 lbs
 Visit on Amazon →
This is the arm I would hand a client running two 24-inch or two 27-inch panels side by side. The MechaSpring gas spring is the part that matters, and the rating on this one is 15.4 pounds per arm, which gives a typical 27-inch monitor real headroom rather than a knife-edge match. Tilt, swivel, and rotation are all on the joint, so you can set the screens at an angle and pivot one to portrait without pulling the whole thing apart.
The tool-free VESA mount is the detail that sells it for a two-monitor install. I time installs with a stopwatch, and the afternoon disappears into plate hardware that needs three different Allen wrenches and a second set of hands. Plates you can seat by hand mean one person can hang both screens and still have time to route cables properly.
Flaws but not dealbreakers: The 13-27 inch range and the 15.4-pound cap are real limits. A 34-inch ultrawide is out of scope here, and a heavier 32-inch panel is pushing it. Check your desk edge for a clamp lip before you commit, because a thick apron or a drawer box underneath can block the mount even when the thickness looks fine.
Anyone with two mid-size panels and a standard desk edge gets the most out of this one. Check current Amazon price.
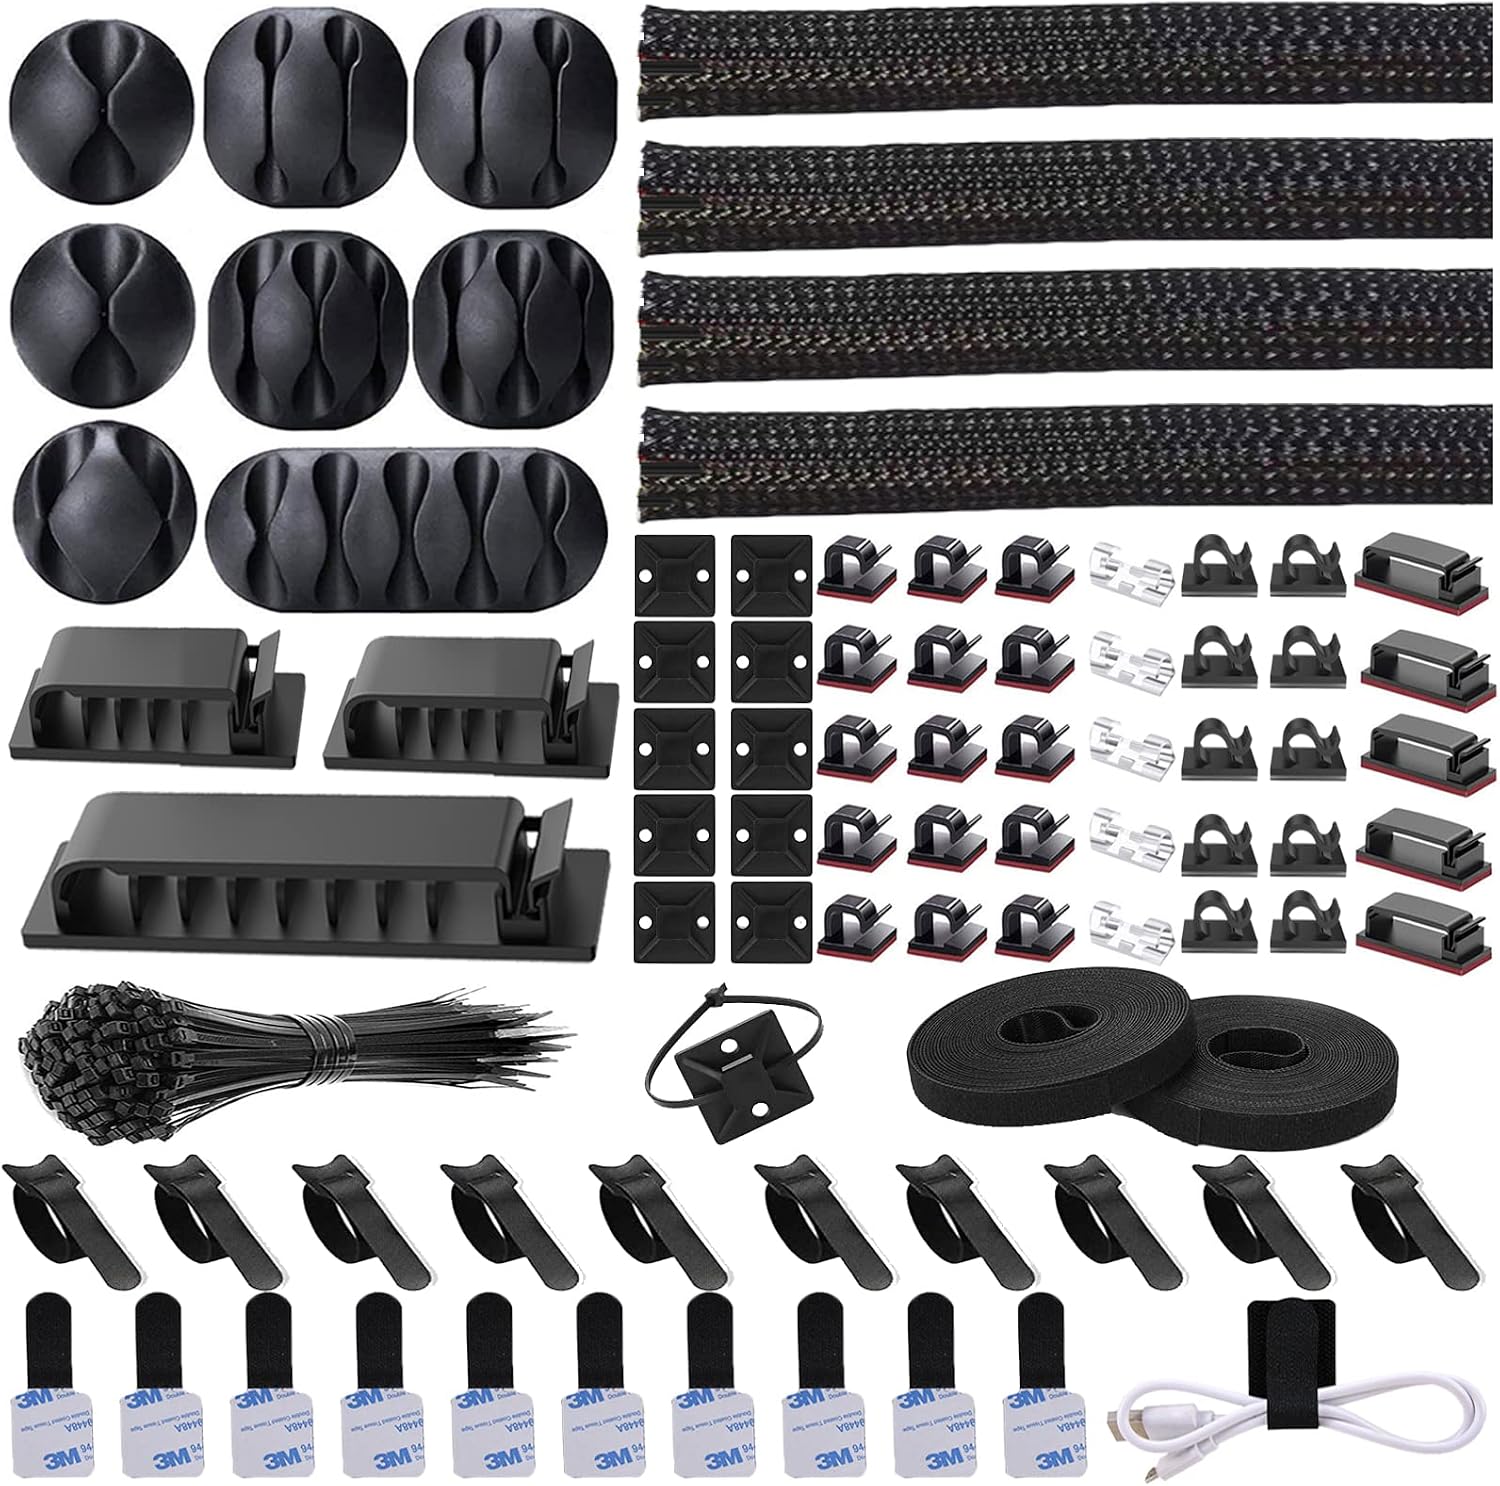
The finishing piece: N NOROCME 192 PCS Cable Management Kit 4 Wire Organizer Sleeve
 Visit on Amazon →
Sleeves are the difference between a monitor that floats and a monitor that dangles. This kit is built around four wire organizer sleeves, with a 192-piece assortment behind them for holding the run in place. The sleeves do the visible work: they turn three separate cables into one clean line that follows the arm instead of hanging in a loop behind it.
The reason I pair a sleeve kit with a dual arm instead of buying the two separately later is sequencing. You want the cables sleeved on the bench, before the monitors go on the arm, when you can still lay everything flat and zip it without fighting gravity. Doing it afterward means working upside down behind a screen.
Flaws but not dealbreakers: A 192-piece kit is more pieces than most single-desk setups will use. That is not a complaint so much as a storage note. Keep the leftovers in a labeled bag, because you will want them the first time you add a USB hub or a second monitor.
Anyone running DisplayPort, HDMI, and power up a dual arm should grab this before the install, not after. Check current Amazon price.
The actual setup workflow
This works on any clamp-mounted dual arm, in this order. Read it once before you start, then run it.
Step one: measure the desk. Thickness at the edge, plus any lip, apron, or drawer box that sits within a few inches of the edge. A clamp needs flat material and clearance below. If the underside is blocked, you are looking at a grommet mount instead, which is a different purchase decision and worth knowing before the box arrives.
Step two: verify VESA and weight. Flip both monitors over. You want 75x75mm or 100x100mm hole patterns. Then weigh each monitor without its stand, or look up the spec. Compare that number to the arm's rating and leave yourself margin. If your monitor has no VESA holes, no arm on the market solves that without an adapter.
Step three: sleeve the cables before anything is mounted. Lay the DisplayPort or HDMI cables, the power cables, and any USB run on the desk. Bundle them into one sleeve. Leave a service loop at the monitor end so you can rotate a screen to portrait without pulling the connector.
Step four: clamp the base. Pad the desk surface if the clamp has bare metal. Tighten evenly, alternating sides so the clamp seats square rather than cocked. Test it with a firm push before you load anything on it.
Step five: attach the VESA plates to the monitors. Do this with the monitors lying face down on a towel, not standing up. On a tool-free mount this is hand work, which is the entire reason to pick one.
Step six: hang the screens, then set gas spring tension. This is the step people rush. Set the tension with the monitor at mid height, adjust, and let go slowly with a hand under the panel. The arm should hold position without drifting up or sinking down. Too loose and the monitor sags over a month. Too tight and you fight it every time you move it.
Step seven: set tilt tension. Tilt should hold position but still move with a firm hand push. If yours needs a hex key, set it once, correctly, and accept that you will not touch it again.
Step eight: place the screens ergonomically. Top of the primary screen at or slightly below eye level. Screens about an arm's length away. Angle the second monitor inward rather than leaving it flat, and keep both at the same height unless you have a reason not to.
Step nine: run the wobble test. Type hard. Tap the desk edge. Bump the clamp. If the screens shake, the fix is almost always the clamp or a loose joint, not the arm. Snug the joints in one pass and re-test.
Step ten: cable audit from the front. Sit in your chair and look at the desk. If you can see a cable between the monitor and the arm, you have one more pass to do. This is the check that separates a finished setup from an assembled one.
Why other arms lost this spot
The Ergotron LX is still the benchmark for me. It is the arm I point to when a client says they want to buy once and never think about it again, and the design has earned that reputation over a long run. It is also more arm than a two-monitor budget setup needs.
ErGear makes the best budget arms I have handled. The gas springs hold up far better than the price suggests, and for a single lightweight monitor they are an easy recommendation.
VIVO's dual arms are the best value for side-by-side setups, but the VESA plates are fiddly, and fiddly plates are exactly what makes a two-monitor install take all afternoon instead of an hour.
North Bayou is the best "good enough" arm. It works, and you can feel the plastic in the joints the whole time you own it.
And anything that needs a hex key to adjust tilt is off the list entirely. You will set it once, hate it, and never touch it again while your neck pays for it.
What this setup asks of you
The honest math is time, not money. Measuring the desk and checking VESA takes about ten minutes. Clamping the base and hanging two screens runs roughly an hour if you are working alone and being careful. Sleeving and routing the cables is another twenty minutes if you did it on the bench, or an hour of swearing if you did it last.
That is one afternoon, once. Against it, you get your desk surface back, two screens at eye level instead of on factory stands, and a setup that still looks intentional a year from now instead of sagging under a loose joint.
Do the measurements before you buy, sleeve the cables before you mount, and tighten everything in one final pass. That is the job, and it is a job you only have to do once per desk.