Most monitor arms do not fail because they were cheap. They fail because the person installing them skipped three measurements and then cranked a bolt until it rounded. WALI monitor arm installation is not complicated, but it is unforgiving of assumptions, and the mistakes do not show up on day one. They show up in month three, when the arm starts to drift and you have already thrown away the box.
I have set up more than 200 desks over five years of running a home office side business, on top of 13 years as an IT infrastructure engineer. The pattern is always the same. The arm is fine. The desk edge is wrong, the VESA plate is loose, or the gas spring tension was never set with the monitor actually hanging on it.
Here is the install sequence I use on client desks, the two WALI arms I keep coming back to for it, and the failure points that cost people their return window.
Why you should trust me
I build desks for a living, and I am picky about the boring parts. Every arm I install gets the same treatment: a desk fit check before anything is unboxed, a full-extension test with a real monitor on it, and a cable management pass that I refuse to skip. I keep a torque wrench in my desk drawer because "finger tight" is a marketing phrase, not a specification.
My bias is simple. A monitor arm is a long-term furniture purchase, not a gadget. The arm that sags in month three was never cheap, it was just paid for in a second purchase.
How I picked and how I tested
The two arms below are not a ranked list of everything on the market. They are the two shapes that solve the two problems people actually have: two monitors side by side, and one monitor that needs to sit higher than a normal arm allows. Everything here is judged on the same four-point checklist I use on client desks.
First, does the gas spring hold position at full extension, or does it creep down over a week? Second, can you adjust tilt without hunting for a hex key? Third, does the clamp fit the desk it is going on, including the steel rail that runs under the edge of a lot of cheap desks? Fourth, would I install it in a paying client's office and walk away without a follow-up call?
Weight ratings are where most spec sheets lie to you. A 22 lb rating assumes a bare monitor. Add a heavy VESA adapter, a cable bundle, and a webcam clipped to the bezel, and you have eaten most of the headroom that keeps an arm from sagging. I always want the arm rated above the monitor, not at it. That headroom is the entire point of paying for a real gas spring.
The arms worth clamping to your desk
Both arms here use the same mounting logic, so the install steps below apply to either one. What changes is the geometry and how much leverage the arm puts on the clamp.
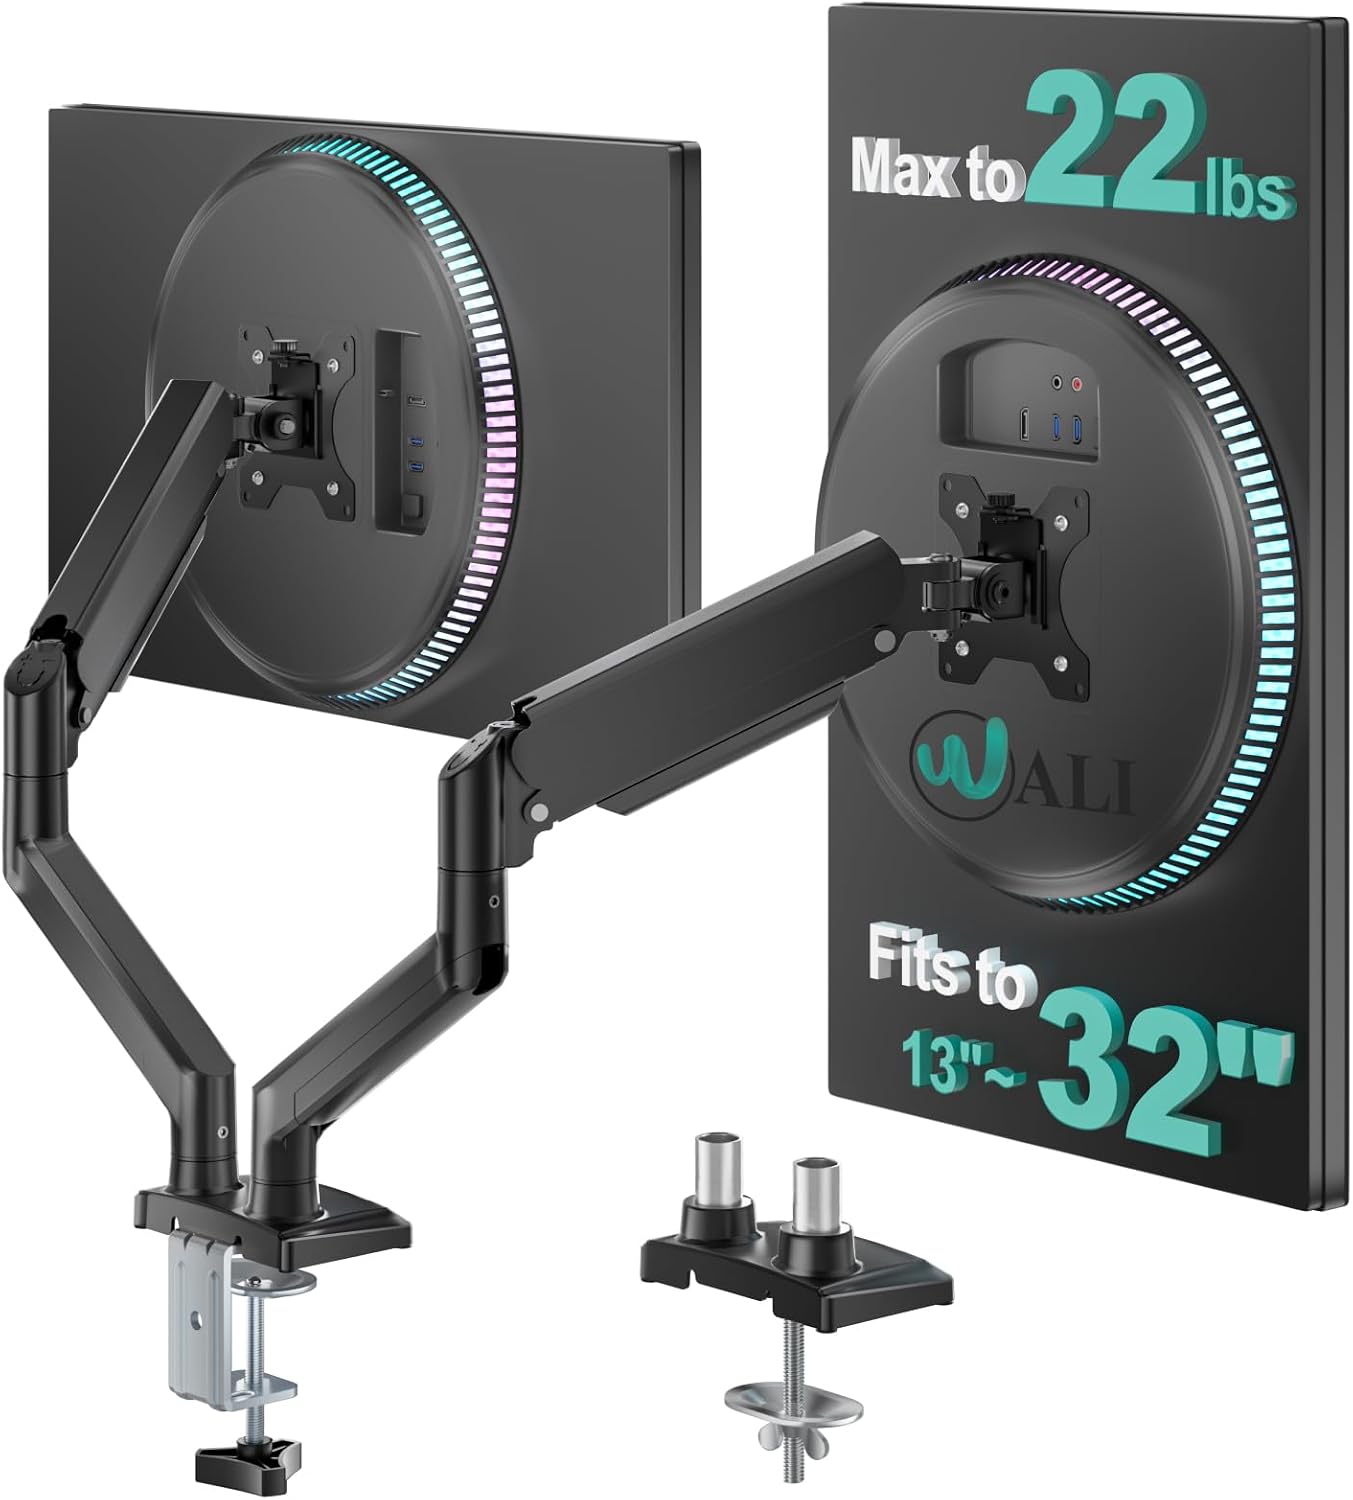
Dual monitor pick: WALI Adjustable Dual Monitor Arm for 13-32 inch Screens, 22 lbs per Arm
 Visit on Amazon →
This is the one I point at when someone has two 24 to 27 inch panels and wants them side by side. Two arms on one base means one clamp footprint, one cable run, and one height reference, which is the whole reason to buy a dual instead of two singles. It covers 13 to 32 inch screens at 22 lbs per arm, so a standard office panel sits well inside the rating.
The install detail that matters with a dual is alignment. Both VESA plates have to sit at the same height on the upright, or the two monitors will look crooked even when each arm is individually level. Set the height on both before you hang either monitor, not after.
Flaws but not dealbreakers: A dual arm concentrates two monitors of leverage on one clamp. If your desk edge is thin or the lip is shallow, this is the arm that will find out.
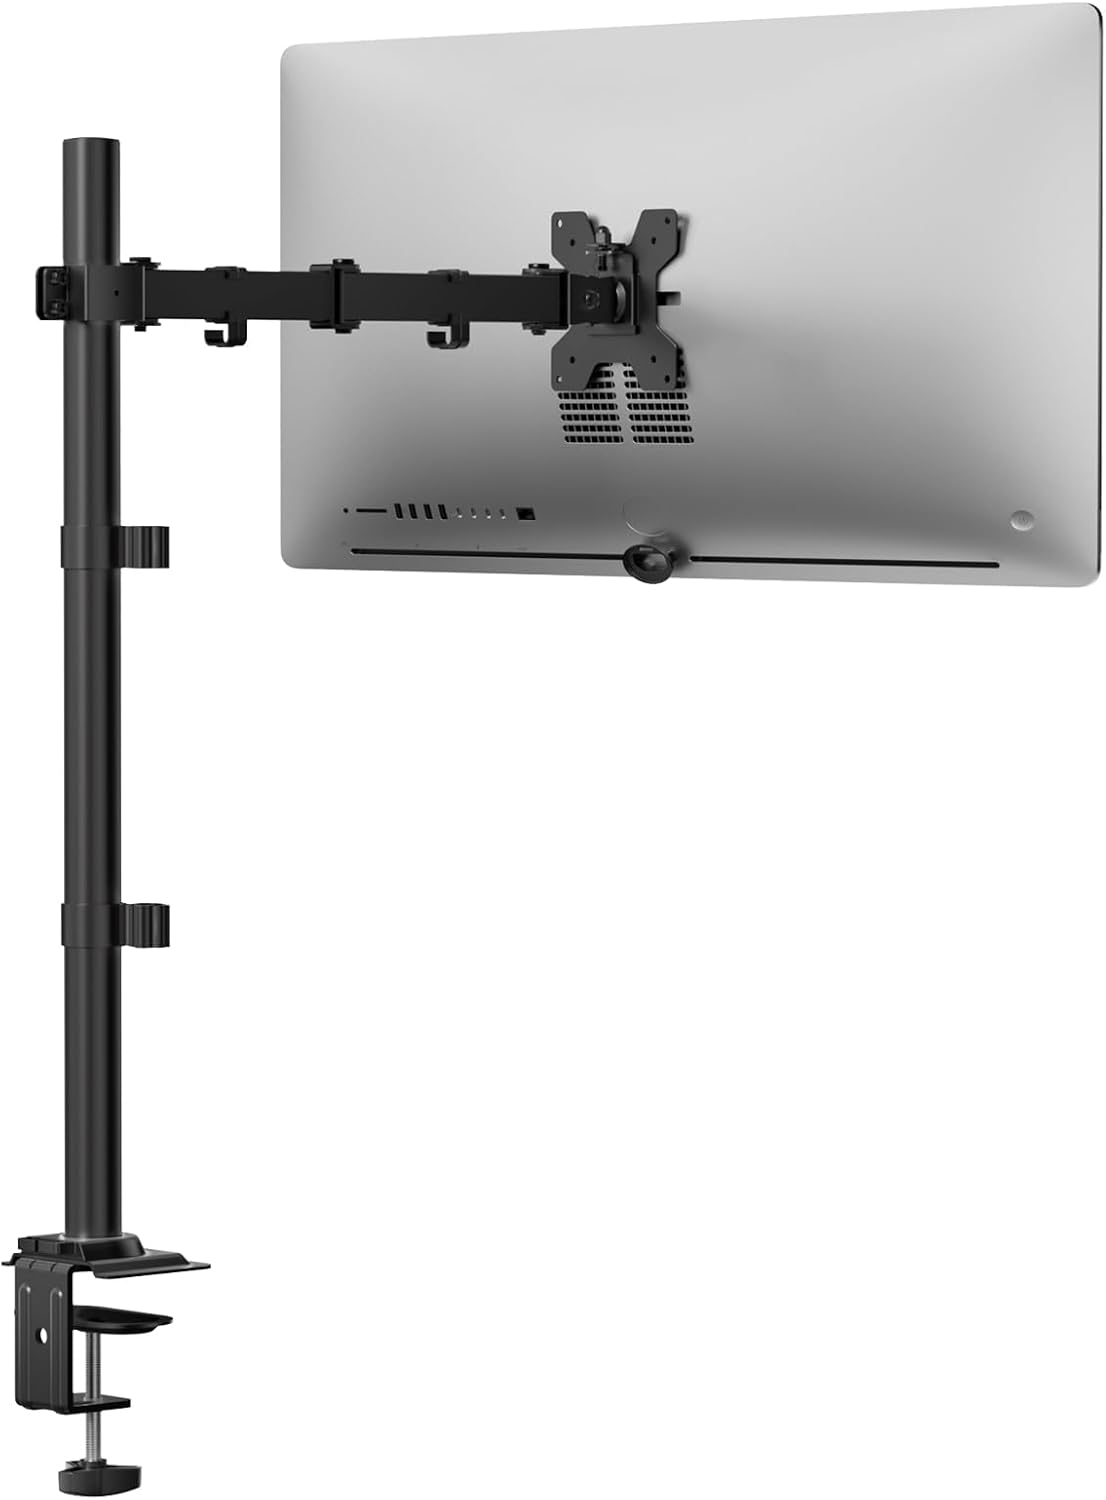
Tall single pick: WALI Tall Monitor Arm Mount for Desk for 13-34 inch Screens, 22 lbs per Arm
 Visit on Amazon →
The tall version solves height, not width. Same 22 lb per arm rating, wider 13 to 34 inch screen range, but a taller upright. That extra height is what you want when the bottom edge of the monitor needs to clear a riser, a dock, a speaker, or the pile of gear that ends up behind every desk.
If you have ever stacked books under a monitor stand to get the screen up to eye level, this is the arm that replaces the books. Because the upright is taller, the monitor sits further from the clamp, which means more leverage on the desk edge. The clamp check in step one matters twice as much here.
Flaws but not dealbreakers: Tall arms are visually louder. A monitor floating well above the desk looks intentional only if the cables are managed. Do not skip step eight.
The install, step by step
Set aside an hour the first time. The second one takes twenty minutes.
Step one: measure the desk, not the monitor. This is the step everyone skips and the one that causes returns. Measure desk thickness at the exact spot where the clamp will sit, not at the corner where you happened to have a tape measure. Then look under the edge. A lot of desks have a steel frame rail or an apron running along the underside, and that rail will stop a C-clamp dead. If you have a grommet hole, measure its diameter and how far it sits from the desk edge. Write all three numbers down before you order anything.
Step two: confirm the VESA pattern and the real weight. Look at the back of the monitor. You need either a 100x100mm or 75x75mm hole pattern. No holes, no arm, and no adapter is going to save a monitor that was never designed to be mounted. Then weigh the monitor with its cables, not from the spec sheet. Compare that to the arm's per-arm rating and make sure you are comfortably under it.
Step three: pre-thread the cables while the arm is still on the desk. Route the DisplayPort or HDMI and the power cable through the arm's channel before it goes up. Doing this afterward, with the arm clamped and the monitor hanging, is how people end up with a permanent loop of cable dangling under a floating screen. Leave a service loop at every joint so the cable is never the thing stopping the arm from moving.
Step four: set the base, clamp or grommet. For a clamp mount, the top plate goes on the desk surface and the C-clamp goes underneath. Thread it by hand until it contacts the desk, then finish with a wrench. Hand tight is a starting point, not a finished state. Snug it and give it a quarter turn more. You are trying to stop movement, not crush the desk. For a grommet mount, feed the bolt through the hole and tighten from below the same way.
Step five: attach the VESA plate to the monitor while it is face down. Lay the monitor on a towel on a table, screen down, and bolt the plate on there. Use the correct screw length. Screws that are too long can bottom out inside the monitor housing, and that is an expensive mistake. If the back of the monitor is recessed, use the spacers. Tighten all four screws evenly, not one until it stops and then the rest.
Step six: hang the monitor and set the gas spring tension. Lift the monitor onto the arm with the plate engaged. Then, with the monitor actually mounted, adjust the tension until the arm holds position on its own. Push it out to full extension and let go. It should stay put. If it drifts down, add tension. If it springs up, back it off. Tension set with no monitor on the arm is meaningless, which is why this step comes last.
Step seven: dial in tilt and swivel. Set tilt so the screen is perpendicular to your line of sight, not tilted back like a laptop lid. If your arm adjusts tilt by hand, you will actually do it. If it needs a hex key, set it once and accept that you will never touch it again.
Step eight: manage the cables properly. Slack at the joints, a tidy run down the upright, and a small loop behind the monitor so the connectors are not under tension. A floating monitor with dangling cables looks broken, and it is the difference between a setup that reads as intentional and one that reads as unfinished.
Step nine: re-torque everything after a week. Bolts settle. The clamp relaxes a fraction as the desk material compresses. Go back once after seven days, check the clamp, check the four VESA screws, check the arm joints. Two minutes now saves a monitor later.
Where most installs go wrong
Glass desk tops without a backing plate. A C-clamp on bare glass is a stress fracture waiting to happen. Use a grommet mount or put a rigid plate between the clamp and the glass.
Over-tightening to stop wobble. If the arm wobbles, the problem is usually the joint tension or a loose VESA plate, not the clamp. Cranking the clamp harder just damages the desk.
Trusting the weight rating as a ceiling instead of a floor. A 22 lb arm holding a 22 lb monitor has zero headroom and will sag. Leave margin.
Mounting a dual arm on a thin desk edge. Two monitors on one clamp is a lot of leverage. Check the desk before you commit.
Ignoring the tilt joint on a heavy panel. Ultrawides put more torque on the tilt mechanism than the weight number suggests, because the load is far from the joint. Set the tension before the monitor starts drooping.
Skipping the cable pass on day one. Nobody ever goes back and does it later. Do it while the arm is still loose on the desk.
What this actually costs you
The arm is the cheap part of this project. The expensive part is doing it twice, which is what happens when the clamp does not fit the desk or the VESA screws are the wrong length and you find out after the return window closes.
Budget an hour for the first install and twenty minutes for the second one. Add a week before you trust it, because the re-torque pass is what separates an install that lasts five years from one that starts drifting in month three. And if you are mounting two monitors, buy the dual arm once rather than two singles you have to align against each other forever.
The measuring takes ten minutes. The clamping takes five. Everything else is just doing the steps in the right order, which is the entire difference between an arm that holds and an arm that annoys you until you replace it.