Most monitor arms do not fail. Installs fail. The arm that sags in month three, the clamp that chews the edge of a particleboard top, the tilt joint that drops the second you let go: nearly every one of those is a measurement somebody skipped before the first bolt turned.
I have set up more than 200 desks around Raleigh, first as an IT infrastructure engineer and for the last five years as a side business building home offices. A gas spring monitor arm install is the job I get called about most, usually after someone has already boxed one up and sent it back.
Here is the order I do it in, and the four numbers you need before you order anything.
Why you should trust me
I am not a warehouse reviewer. I am the guy clients call when the arm they bought on a whim is drooping over a monitor that cost more than the arm. Thirteen years in IT infrastructure, more than 200 desks assembled, cable-managed, and monitor-armed, plus a side business that lives or dies on whether the thing I bolted to a desk is still level a year later.
I keep a torque wrench in my desk drawer because "finger tight" is a story people tell themselves right before a clamp slips. Every arm I put my name behind gets judged on the same four things, in this order: gas spring, VESA fit, clamp width, tilt tension. Paint color and marketing copy come after that, if at all.
How I picked and how I tested
This is an install guide, not a shootout. The arm below is the one the steps are written around, and the workflow applies to any clamp-mounted single arm you already own.
The checklist every arm gets before it earns a recommendation: does the gas spring hold a 27-inch panel at full extension without drifting down overnight, is the tilt adjustable without hunting for a hex key, does the clamp fit the desks I actually see in clients' homes (1 to 1.5 inch tops, some with a beveled edge or a steel frame rail underneath), and does the cable channel swallow a DisplayPort cable plus a power cord. The full trial is 90 days of daily use at full extension, a wobble test with a 27-inch monitor pushed all the way out, and a cable audit at the end.
That trial is also how you find out whether the arm you already own is worth keeping. If it drifts an inch a week, no amount of tension adjustment fixes a tired gas spring.
Four numbers to take before you buy anything
Get these before you spend a dollar. Write them on the box your arm ships in.
Desk thickness at the edge. Not the middle. The edge, where the clamp grabs. Clamp bases need a flat lip, and a desk that tapers or has a rounded edge gives the clamp almost nothing to bite.
Flat lip depth under the desk. Some desks have a steel frame, a drawer rail, or a support beam running along the underside of the edge. If that beam is where your clamp wants to sit, you need a grommet mount or a backer board.
VESA pattern. Look at the four holes on the back of your monitor. 75x75mm and 100x100mm are the common sizes. No VESA holes means no arm, no exceptions, unless the monitor has an adapter plate available.
Monitor weight with cables attached. Weigh it as it will hang, with the DisplayPort cable and the power brick dangling off it if that is how you route them. Then buy an arm with headroom. An arm rated well above your actual load is not overkill, it is the margin that keeps the gas spring from living at the end of its travel.
Clamp or grommet: a desk thickness decision
This is not a style choice. It is a question about your desk.
The clamp grabs the edge. It needs a flat lip, 1 to 2 inches of clearance underneath, and a top thick enough that you are not crushing a hollow core when you tighten it. On a solid hardwood or a thick laminate top, a clamp is the fastest install you can do.
The grommet base drops through the cable hole in the back of the desk and bolts from underneath. It is stronger, it keeps the desk edge clean, and it does not care how thick the top is. If your desk has a grommet hole, use it. If it does not, and the underside of your desk is a mess of rails, a clamp with a plywood backer plate is the honest answer.
The arm this guide walks through
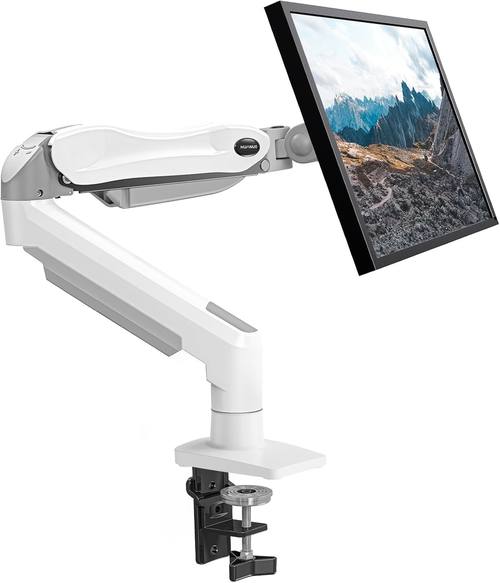
The HUANUO single arm is the one I point people to when they want a gas spring arm with both mounting options in the box, so they can measure and decide after it arrives instead of guessing at checkout.
Our pick: HUANUO Single Monitor Mount, 13 to 32 Inch Gas Spring Monitor Arm, Adjustable Stand, Vesa Mount with Clamp and Grommet Base - Fits 4.4 to 19.8lbs LCD Computer Monitors
 Visit on Amazon →
The spec sheet covers 13 to 32 inch panels and a 4.4 to 19.8 pound load range, and it ships with both a clamp base and a grommet base, which is the part I care about. That dual-mount setup means you can measure your desk edge after the box lands and still have a second option if the clamp has nothing to grab.
A gas spring in this class is at its best with lighter panels. My honest read on HUANUO as a brand is that the arms are fine for lightweight monitors, and the tilt joint is the first thing to show wear if you hang a heavy ultrawide on one and fight it every day. Pair it with a 24 to 27 inch panel in the middle of the weight range and it behaves.
Flaws but not dealbreakers: The tilt joint is the wear point on heavier panels, so set tilt tension once and leave it alone. If you are mounting a 34-inch ultrawide at the top of the weight range, plan on a stiffer arm.
Anyone with a single 24 to 27 inch monitor and a desk edge they can measure will get everything they need here.
The install, step by step
Step one: clear the desk and photograph the back of the monitor. Before you unplug anything, take a photo of the cable routing and the VESA holes. You will want it when you are on your back under the desk wondering which way the plate faced.
Step two: attach the VESA plate to the monitor. Lay the monitor face down on a towel or the box foam. Bolt the plate on finger tight first, then snug the screws in a diagonal pattern, the way you would torque a wheel. Do not fully crank one screw before the others are started.
Step three: mount the base. Clamp or grommet, your call from the measurements above. Tighten the clamp evenly on both sides if it has two screws. Stop when the base stops moving, not when your forearm aches. Particleboard and veneer crush permanently, and a crushed edge is where a clamp starts slipping six months later.
Step four: assemble the arm on the post. Most single arms go on in two pieces, a lower arm and an upper arm. Seat each joint fully before you load it. If a joint does not click or seat flush, stop and check the orientation.
Step five: hang the monitor, and keep one hand on it. Slide the plate onto the arm head and tighten the retaining screw. Do not let go until that screw is snug. This is the step where monitors get dropped, and it is always the same reason: someone trusted the bracket to hold before it was locked.
Step six: set the gas spring tension. Support the monitor with one hand and turn the adjustment in small increments. Start with less tension than you think you need. The goal is a monitor that stays put when you let go, not one that launches upward when you nudge it.
Step seven: set tilt tension. Do this with the monitor already on the arm, in small quarter turns. If your arm needs a hex key for tilt, set it now and accept that you will never touch it again, which is exactly why I avoid arms built that way.
Step eight: route the cables. More on this below, but do it now, not later.
Step nine: run the wobble test. Push the monitor to full extension and tap the desk. A little movement is normal. A rhythmic bounce that keeps going after the tap means the clamp is loose, the joint is not seated, or the arm is overloaded.
Tension: the two adjustments people skip
The gas spring holds the monitor up. The tilt joint holds the angle. They are separate adjustments on most arms, and they interact.
Set the gas spring first, with the monitor hanging. Then set tilt. If you set tilt first and then crank the gas spring, you will chase the angle for twenty minutes and blame the arm.
One rule from a lot of desks: if the tilt joint needs a hex key to adjust, it will be set once, wrong, and never corrected. Your neck pays for that. Buy arms where tilt adjusts by hand, or accept that you are locking in whatever angle you guessed during install.
Cable management is not a finishing touch
A floating monitor with cables hanging off the back looks broken, and it puts load on the arm. Route the DisplayPort and power cables through the channels on the arm before you sit down to use it. Leave a service loop at the monitor end so the cable is not under tension when the arm swings out, and leave slack at the desk end so a full extension does not yank the connector.
The audit I run: push the arm to its farthest point in every direction and check that nothing pulls taut. If a cable goes tight at the far end of the range, it is going to fail at the connector eventually.
Testing it before you trust it
Give it a week. Re-check the clamp after seven days, because wood and laminate settle. Sweep the monitor through its full range of motion once a day for that first week. If the gas spring has dropped by morning on day three, the load is too heavy for that arm or the tension is too low, and both are fixable now while the return window is open.
The hitch rack that shipped alongside this guide
One product record came through with this batch that has nothing to do with monitors, and I would rather tell you what it is than pretend it fits.
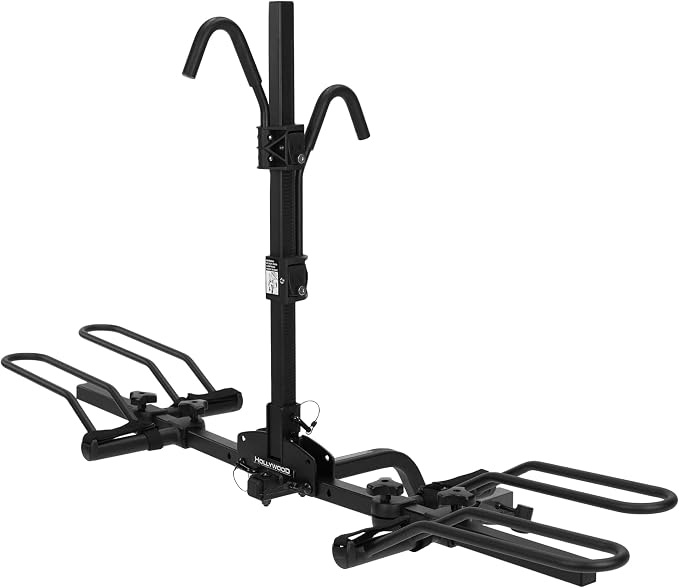
Not a monitor arm: Hollywood Racks, Trail Rider, Hitch Mount Rack, 1-1/4'' and 2'', Bikes: 2
 Visit on Amazon →
This is a hitch mount bike rack for two bikes, built for 1-1/4 inch and 2 inch receivers. It is not part of a monitor arm install and it will not hold a monitor. If you landed on this page searching for a two-bike hitch rack, the link above is the product you want. If you are here to get a monitor off your desk, skip it and go back to the measurements.
What this all costs
The install itself is free and takes about an hour the first time, thirty minutes once you know your desk. The expensive version is doing it in the wrong order: buying an arm before measuring, discovering the clamp has nothing to grab, returning it, and buying again.
The other hidden cost is headroom. An arm rated well above your monitor's actual weight is not a waste of money, it is the reason the gas spring still holds the monitor at year three instead of year one. Cheap arms are not cheap if you replace them.
Time, roughly: 20 minutes to measure and check VESA, 40 minutes to mount and adjust, a week of daily sweeps to confirm it is holding. That is the whole job.
Mistakes that cost you the return window
Overtightening the clamp. A clamp that crushes a particleboard edge has already lost its grip. Snug, then check it in a week.
Buying with zero weight headroom. If your monitor sits at the very top of an arm's rated range, the gas spring lives at the end of its travel and sags first.
Ignoring the underside of the desk. The top can look perfect while a support rail blocks the clamp entirely.
Trusting "tool free" marketing. Plenty of tool-free arms ship with three Allen wrenches in the box. Time the install with a stopwatch and you learn the truth quickly.
Setting tilt with a hex key and never touching it again. If the joint needs a tool, you will not adjust it, and you will spend the next two years leaning toward the monitor.
Do the four measurements, set the gas spring before the tilt, route the cables before you sit down, and check the clamp after a week. That is a monitor arm install that survives past the return window, which is the only test that matters.