A pole-mounted monitor arm solves a problem that a single-joint desk arm cannot. The post is a fixed vertical rail, the collar slides up and down it, and your height adjustment stops fighting the joint that is already holding a screen. That is the appeal, and it is real.
The catch is that every pole-mounted monitor arm install happens at the desk edge, and the desk edge is the part almost nobody measures. I have watched people burn an afternoon on an arm that was never going to fit their desk, and I have watched a five-minute clamp job hold a 32-inch screen level for three years. The difference is the order of operations, not the logo on the box.
This guide is that order: measure the edge, confirm the mounting pattern, assemble the post off the desk, torque the clamp, then hang the monitor. Done in that sequence, the job takes about an hour, and most of that hour is the part where you look under the desk with a flashlight.
Why you should trust me
I have been an IT infrastructure engineer for 13 years, and I have run a side business setting up home offices for the last five. That is more than 200 desks assembled, cable-managed, and monitor-armed, plus a few hundred more in office buildouts where the furniture was older than some of the people using it.
The standard I hold an arm to before it earns a recommendation: a 90-day daily-use trial, a wobble check with a 27-inch monitor pushed to full extension and a light tap on the desk, and a cable management audit to see whether the channels actually hide the cables or just relocate the mess. I keep a torque wrench in my desk drawer because "finger tight" on a clamp bolt is a suggestion, not a specification.
I also care about the room the desk sits in. A converted garage office in Raleigh in July is a hot box with a monitor in it, and no arm on earth fixes a room that nobody wants to sit in. That is why one of the two products below is not a mount at all.
How I picked and what I checked
Four things, in this order.
Clamp range against real desk thickness. Manufacturers publish a range, and desks are thicker than people think once you account for a laminate top over a particle board core. Measure the edge with the desk empty, then check the underside for a drawer box, an apron, or a support rail that will block the clamp.
The mounting pattern. Almost every modern monitor has a 100 x 100mm or 75 x 75mm VESA pattern behind the panel. If yours has neither, no arm in this guide will help you, and an adapter plate is a different conversation.
Weight headroom. An arm rated above your monitor's weight holds it without drama. An arm rated exactly at your monitor's weight holds it until it does not. Headroom is the point of the rating, not a bonus.
Tilt adjustment you can reach. If adjusting tilt requires hunting for a hex key, you will set it once and never touch it again. That is how necks get sore.
The two products below are what this install actually needs: the arm that does the work, and the piece that keeps the room usable while you do it. Both links go to the current listing, so put the spec sheet next to your own measurements before you spend anything.
What you need before you start
- A tape measure, and a flashlight for the underside of the desk
- A Phillips screwdriver and your own Allen key set, even if the arm ships with keys
- A towel or a foam block to lay the monitor face down on
- A small level, or a level app on your phone
- Cable ties or hook-and-loop straps
- A second pair of hands for anything 27 inches or larger
- Ten minutes of patience for the measuring step
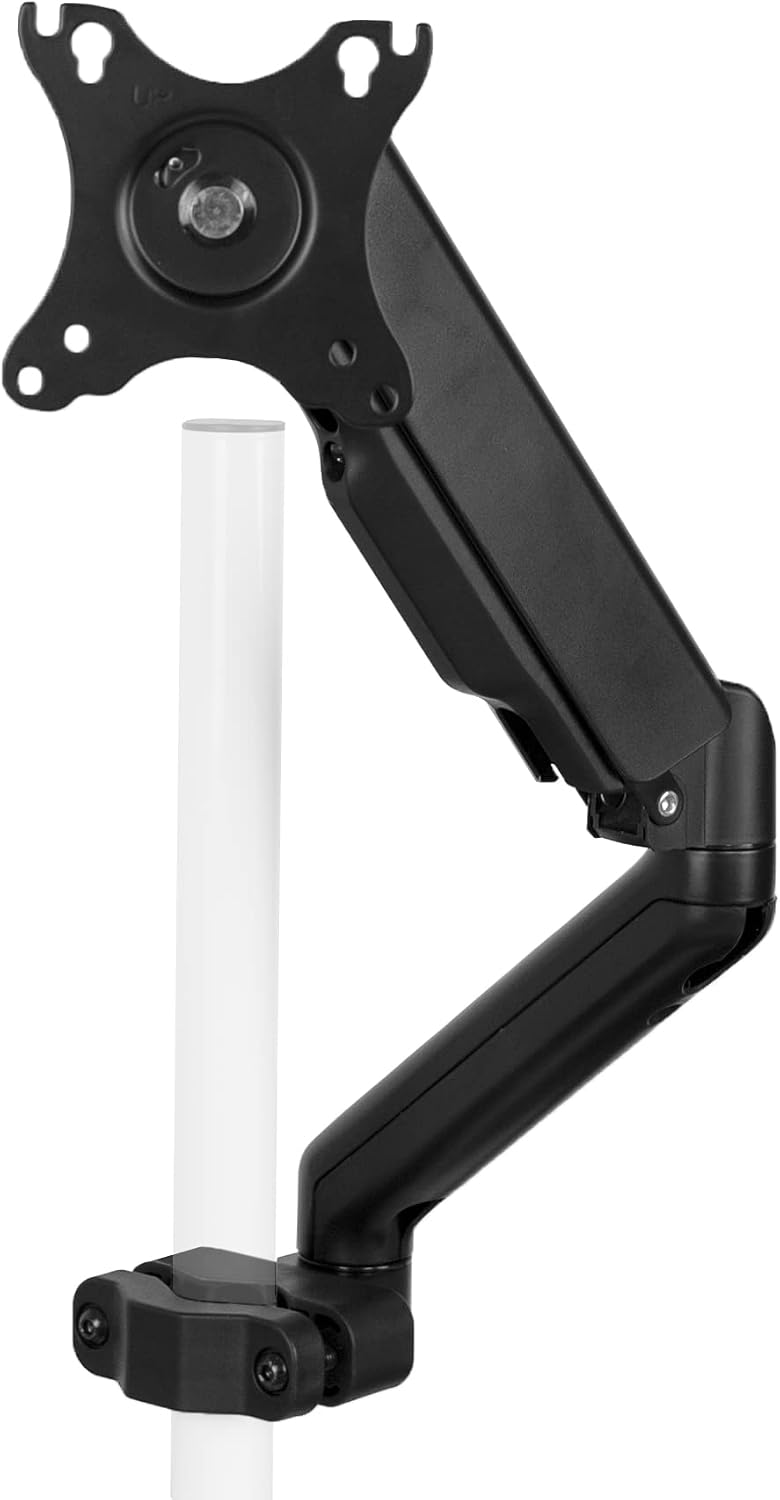
The arm: VIVO Black Pole Mounted Monitor Arm, 17-32 in Screens, MOUNT-POLE05O
 Visit on Amazon →
This is the arm this guide is built around, and the reason is the form factor rather than a spec sheet. A pole mount gives you a vertical post with a collar that slides, which means your monitor height is set by where you park the collar, not by how hard you crank a joint. That distinction matters most on a desk you share with a laptop or a second display, because the post becomes the spine of the whole setup instead of a single clamped elbow.
The screen range covers the 17 to 32 inch band, which is the practical span for a home office. A 24-inch panel at arm's length, a 27-inch in the middle, and a 32-inch on a deep desk all fall inside it. The black finish is the right call for a desk setup, since a silver arm against a black monitor reads as an afterthought.
Flaws but not dealbreakers: A pole mount occupies real estate at the desk edge, so plan where the post lands before you commit. If your monitor sits directly above a drawer bank, you may need to shift the whole rig left or right. Pole arms also ask you to assemble the post and base before anything goes up, which is a five-minute job that people try to skip and then regret.
The right buyer here is anyone who wants one arm that will handle a monitor upgrade later without a second purchase. Check current Amazon price before you decide, because this class of arm moves around more than the premium stuff.
The room the desk lives in
Here is the part that separates a finished office from a desk in a garage. An arm install is an hour of work, and it is miserable work when the room is hot and humid, which is exactly the condition of most converted garages, bonus rooms, and attic offices in the South. Cable management in a 90-degree room is how you end up with cables zip-tied in the wrong direction and a monitor mounted two inches too low.
If your desk lives in a space with a window and no ductwork, a portable unit is the practical answer. That is the only reason a cooling product belongs in a mount guide.
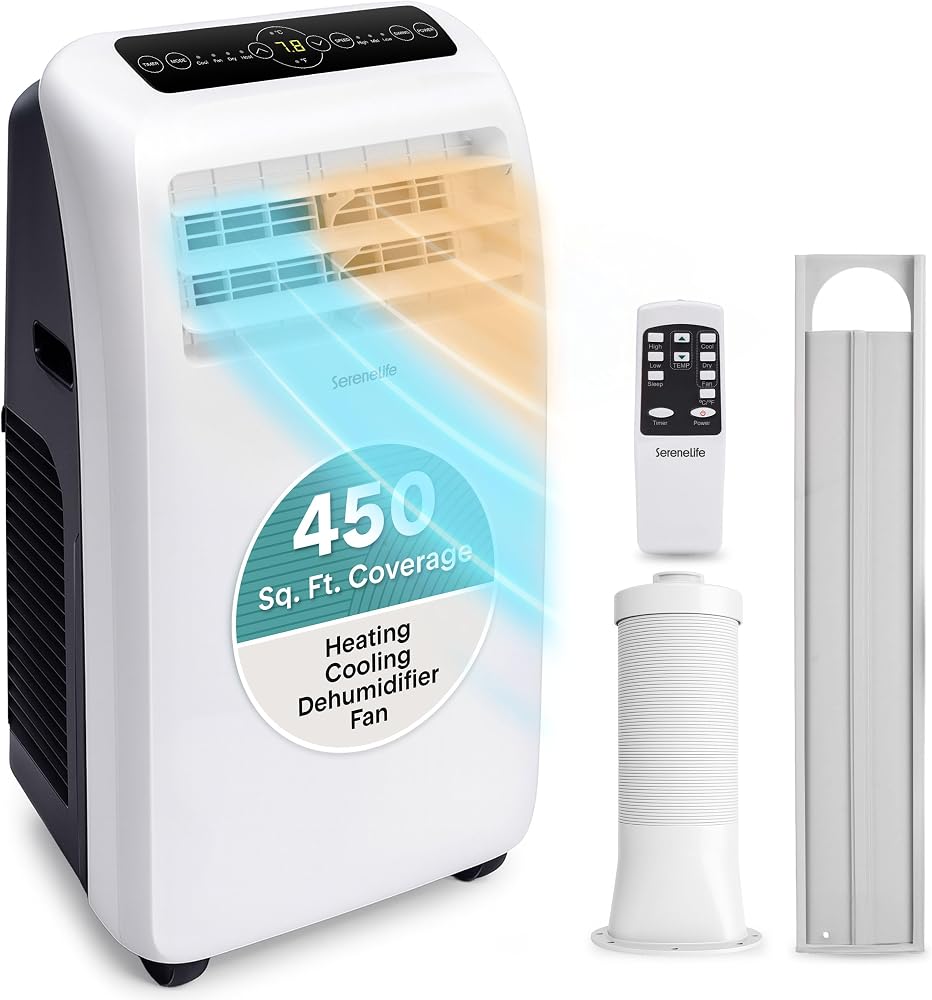
The comfort piece: SereneLife Portable Air Conditioner With Heat & Built-in Dehumidifier 10,000 BTU, Portable Heater & AC For Rooms up to 450 Sq Ft - Remote Control & Window Mount Exhaust Kit Included
 Visit on Amazon →
This is a portable air conditioner with a heat mode and a built-in dehumidifier, rated for rooms up to 450 square feet, and it ships with a window mount exhaust kit and a remote. For a garage or bonus room office, that combination covers both halves of the year, which is the whole reason it earns a spot in an install guide. The unit heats in January and cools in July, and the dehumidifier mode is the one that actually protects your desk, because a garage office that stays damp will swell a wood top and rust the steel in a clamp.
Two things to plan for before it arrives. First, the exhaust has to go somewhere, and the included window kit is the intended path. A window kit that is not sealed around the edges just pushes conditioned air out the same gap it came in through, so buy foam tape and take the ten minutes to seal it. Second, the unit is on casters, which means it will live wherever you park it. Give it a corner that does not fight the desk footprint, and leave the front clear.
Flaws but not dealbreakers: Portable units are louder than a mini split, and this one is not an exception. If you take calls all day, run it hard before the meeting and let the room hold temperature. The 450 square foot rating also assumes a ceiling height and an insulation level that a garage often does not have, so treat the number as a ceiling, not a promise.
The right buyer is anyone setting up a desk in a space that was never meant to be an office. Check current Amazon price, then measure the window you plan to vent through before you order.
The install, step by step
Step one: measure the desk edge. Thickness and depth, in two places, because a desk that tapers will surprise you. Then get under the desk and look for the drawer box, the apron, and any crossbar. The clamp needs a flat, solid lip with clear space behind it.
Step two: check the mounting pattern. Pull the monitor off its stand and look at the four holes. Measure the spacing. 100 x 100mm and 75 x 75mm are the two you will see. Confirm your monitor's weight against the arm rating and leave yourself headroom.
Step three: assemble the post and base on the floor. Do not do this while the clamp is attached to the desk. Post, base plate, clamp hardware, in that order, on a rug, with the hardware sorted into a cup so you are not crawling around looking for a bolt.
Step four: pad the desk and set the clamp. A folded towel under the clamp protects the finish on both the top and the underside. Slide the clamp on from the back edge so the post sits behind the monitor, not in front of your keyboard.
Step five: torque it, then torque it again next week. Snug the clamp bolt, then a quarter turn past snug. Do not hang a monitor on a clamp you can move by hand. Mark the bolt head with a paint pen if you want to see whether it backs out, and re-check it after seven days of daily use.
Step six: set the collar height before you load it. Slide the collar to roughly the height you want and lock it while the post is still empty. Adjusting height with a monitor attached is how people drop things.
Step seven: attach the VESA plate to the monitor on a padded surface. Lay the monitor face down on the towel, line up the plate with the pattern, and start all four screws by hand before you tighten any of them. Cross-threading a VESA screw is a bad afternoon.
Step eight: lift with two people. One holds the monitor, one guides the plate onto the arm. Anything 27 inches or larger is a two-person job, and I do not care how strong you are, because the risk is not the weight, it is the corner of the panel catching the post.
Step nine: set tilt and swivel tension, then level it. Set tension with the monitor on the arm, then check level with the level app on your phone against the top bezel. Small tilt errors are more visible than small height errors.
Step ten: run the cables and do the seven-day check. Route power and display cables through the arm's channels with enough slack for full extension, then come back in a week and re-check the clamp, the tilt tension, and the level. The first week is when things settle.
When the clamp will not work
Some desks cannot take a clamp, and no amount of torque fixes geometry.
If the edge is too thick, or the underside is a full drawer pedestal with no clear lip, look at your grommet holes. A grommet mount passes a bolt through the desk surface instead of gripping the edge, which solves both the thickness problem and the obstruction problem. If the desk has no grommet hole and no usable edge, a wall mount is the next option, and it is a better answer than drilling a hole in a desk you like.
There is one more case worth naming: a glass desk. Clamps concentrate force on a small area, and glass does not forgive that. Use a grommet mount with a wide load-spreading washer, or move to a freestanding mount that carries its own base.
The competition and why it lost
Single-joint desk arms, dual arms, and laptop trays are all good products, and none of them belong in this guide. A single-joint arm clamps the desk and holds one monitor, which is fine until you want to change height, because height and reach share the same joint. A dual arm is the right answer for side-by-side screens and a different install with a different set of measurements. Laptop trays and tablet holders solve a different problem entirely.
Wall mounts lost here because most renters cannot drill, and most garages have a stud layout that does not land where the monitor needs to be. Freestanding mounts lost because they eat desk depth, and desk depth is the first thing you run out of when the monitor moves back.
This guide is about one post, one clamp, one screen, done properly.
What this all costs
Prices on arms and portable units move constantly, which is why both links above say check current Amazon price instead of quoting a number that will be stale by the time you read this. What does not move is the cost of getting it wrong.
The real expense of a bad monitor arm install is not the arm. It is the desk you gouged because you skipped the towel, the return shipping on a clamp that did not fit, and the second arm you buy after the first one sags in month three. Add the hour of your time and the math gets worse.
The install itself is free. Measure the edge, check the pattern, torque the clamp, and re-check it in a week. That is the whole job, and it is the difference between a monitor that floats and a monitor that slowly droops while you pretend not to notice.
Do it in order, and you will do it once.